Friday, 22 August 2014

Felt Flower Earrings

This is more of an idea for an idea


You will need:

  • Felt
  • A felt-tip pen (Wait, felt can't write on felt! What kind of stupid name is that?) 
  • Scissors
  • embroidery thread
  • A needle
  • Super Glue
  • Basic studs (See Vocab Tab)
How it's done:

Real simple: draw a small flower shape on the felt and cut it out. Using the needle and embroidery thread stitch a couple of stitches which cross each other at various angles in the middle of the flower. Make sure to start and end off with a double stitch to keep it secure. Super glue the stud to the back of the flower.

Rating:

Effort Required: 3/10

Quick and simple!

Durability: 9/10

They can withstand wind, water, sleep and even violent hugs.

Cool Factor: 5/10

The cool part about these is that they're not just felt flower earrings. They represent endless possibilities for earrings made of felt. They represent hope and versatility and the dying art of stitching stuff. They represent colour and peace and happiness and all those other reasons hippies protested against war. All you see are the flowers though.


Monday, 18 August 2014

Genie and Lamp Earrings

In my opinion, truly great actors are extremely rare in society today. The death of Robin Williams has just added to that problem. Here on Glue and Random Objects, we tend to put awesome things on our earlobes and I thought that he really deserves a spot on mine. As tribute to him I made Genie and lamp earrings from Aladdin, which I must have watched a bazillion times as a kid and have watched another 4 times since his death. 

You Will Need:

  • Clay in blue, white, black, red and yellow. Once again I used Crazy Clay by Bostik, same as I used for the Biscuit Earrings and the Perry the Platypus Earrings. I prefer to work with crazy clay because it's light, air drying, it sticks together really well and I just find it generally easier especially when including small details. The downside is that it's bouncy, so if you sometimes have butter fingers (guilty, I actually dropped the first head that I made and it bounced away so I had to start again) feel free to work with Polymer Clay or whatever you're comfortable with. Just use your discretion by including baking time or increasing drying time, etc before making them into earrings.
  • Toothpick (optional, I just use my fingers)
  •  Bobby pin

How To:


Obviously you're only going to make on of each thing; 1 Genie, 1 lamp. So you only need enough clay for one each. To make  this tutorial easier, I'm going to divide it into 2 parts. One for Genie and one for the lamp. We'll start with the easiest. 

THE LAMP

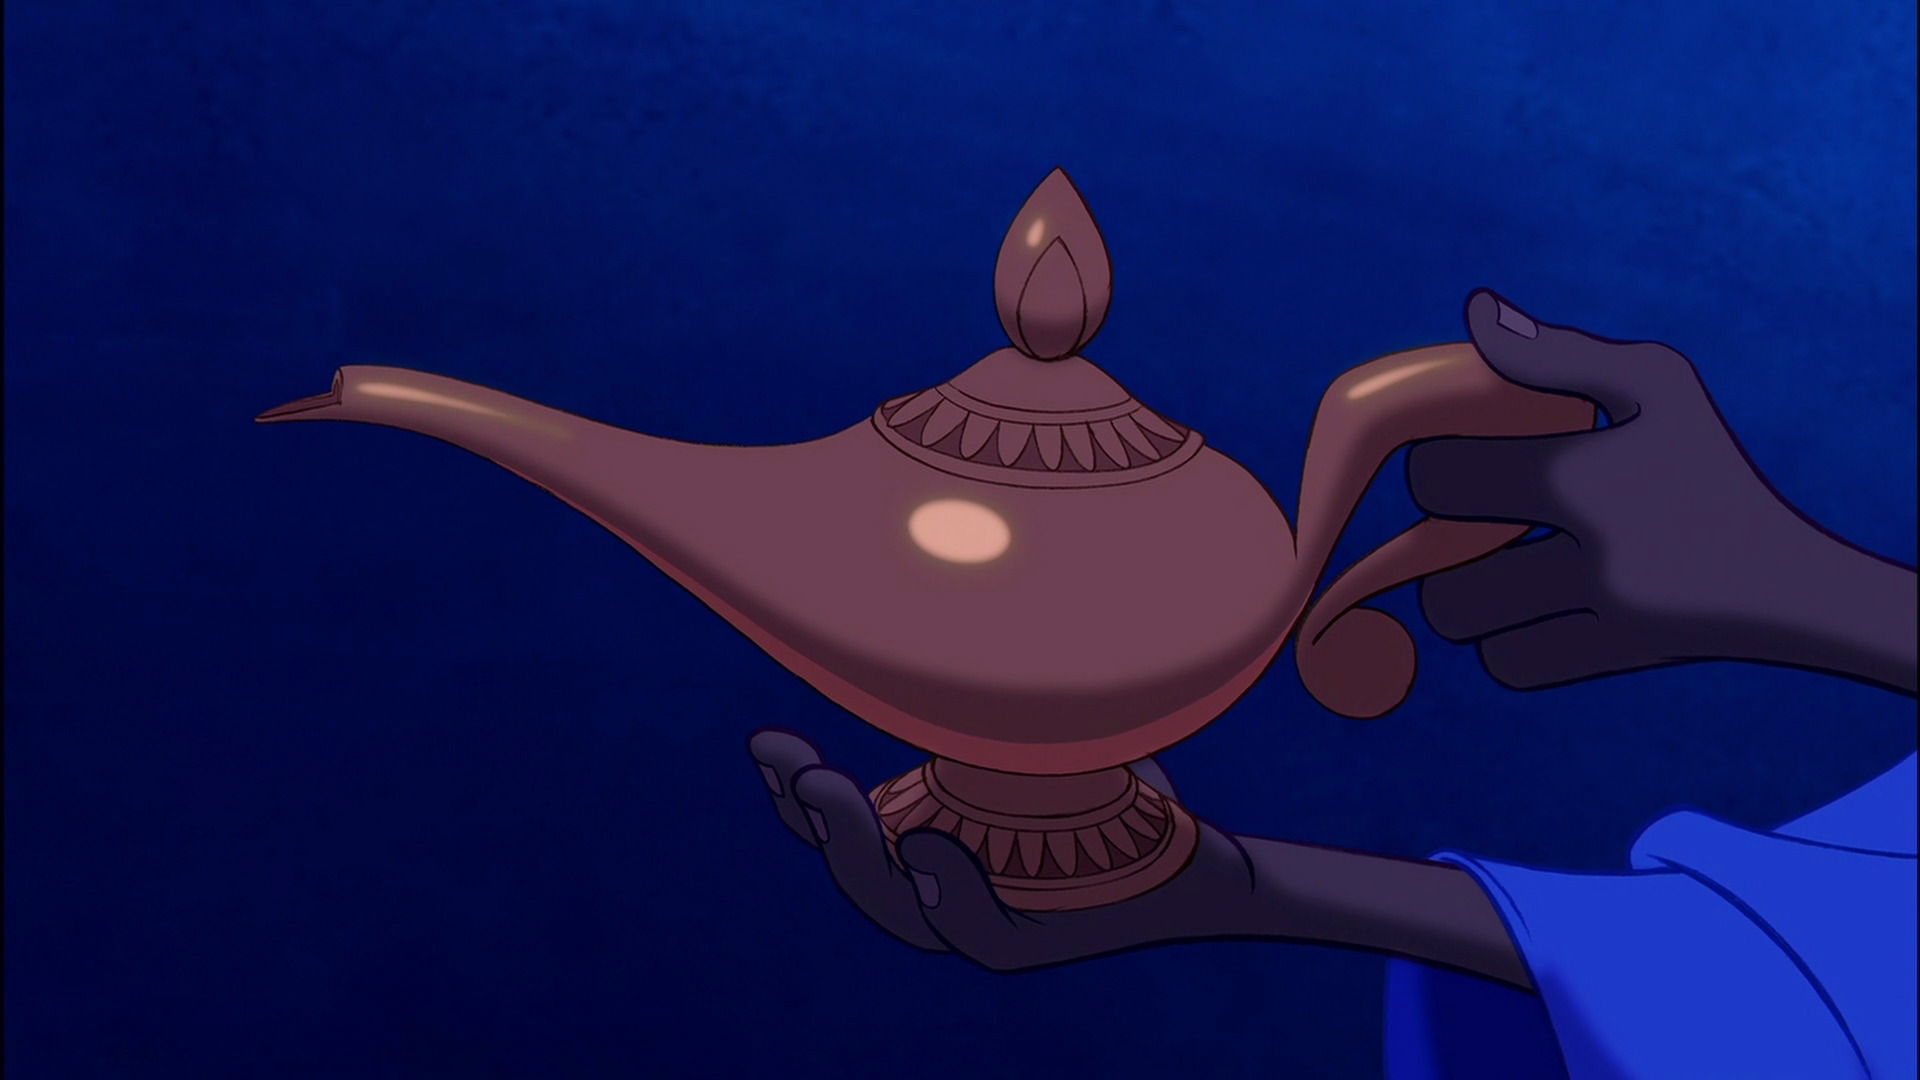
Begin by mixing yellow with a smidgen of red. When I say a smidgen, I mean a smidgen. You want to get a yellow slightly less lemony than they provide, so a yellow with a slight tinge of orange. Mix in increments of red until you're satisfied with the colour.It helps to google a picture of it. Here's the picture I used

Pinch off a little bit and set it aside for Genie's cuffs and earring. Then divide the remaining clay into 5 pieces; the first piece about half of your overall amount, then the second less than that, the third less than the second, etc.

Take the biggest piece and roll it into a ball. Then taper it at one end so that it looks like a stretched teardrop shape. This is going to be used as the body of the lamp. Shape the tapered end into a slight upward curve, like you can see in the picture.

Next you will be working with your two smallest piece. Roll the smallest into a ball and then taper one end to form a droplet shape. Roll the second smallest into a ball and then flatten the bottom to form a subtle dome. Attach the dome flat side down onto the top of the body as the lid and then attach the small droplet point upwards to the top of it to make the handle.

Roll the second biggest piece into an even sausage, roughly 3mm thick. Curl one end of the sausage to create a round little bubble that you can see at the bottom of the handle. Attach the handle to the body on the round end, bending it as you can see in the picture with the little bubble at the bottom.

Finally roll the third biggest piece into a ball and then  flatten one side to create a more pronounced dome than the lid. Attach the round side to the bottom of the body to form the base of the lamp.

GENIE

Take a deep breath and know from the beginning that this is going to be difficult. In order for him to be recognizable, there are a lot of tiny, fiddly details that are a pain to make and attach. Just be patient and methodical. Try to keep your hands steady. Here we go. 

First use blue and white clay to mix a sky-blue colour. Once again, it helps if you look up a picture. This time, the colour doesn't have to be exact because there are so many other details that give Genie character. My blue was not quite right, but I'm running low on white, so I didn't want to make more clay than I would use.

Use about half the clay to make the torso. Roll it into a ball, then flatten it slightly. Taper one end a little so that the shape is vaguely triangular. On the opposite end, pinch and roll two arms on either side. They also need to be a little tapered on the end and make sure to get the beefiness of those biceps. I guess it's the product of 10 000 years cooped up in that tiny lamp. What else is there to do but work out? So right now, Genie should look a little like he's doing the YMCA. In between his shoulders, pinch and roll a little neck for the head to rest on.

Time for the yellow. Remember that little piece you saved from the lamp? OK, so Pinch off a little piece and set it aside for Genie's earring. Divide the remaining clay and roll them into sausages, then squish them flat. These are going to be the arm cuffs. Very carefully, wrap them around Genie's wrists. Start at the side and go around the back, so if you run out of clay and there's a gap, it won't be noticeable when you fold his arms. Use your toothpick here if you find it makes it easier, but be careful not to mark the clay.

Fold his right (your left) arm across his chest and then fold his left (your right) over that one. It should look like his arms are folded. Then take the remaining blue clay and divide it in two unequal parts. The smaller one will serve as his head, so make sure it's head size.

Take the bigger blue part and roll it into an elongated cone. This will be Genie's tail. Stick the flat end to the bottom of the torso. Roll a sausage of red and flatten it, then wind it around the join of the torso and tail to form his belt. Once again, you can use the toothpick here if you find it helps. Once the belt is attached, bend the tail one way and then the other, to form the twist in Genie's tail.

Take the remaining blue clay, pinch off a little and set it aside for the nose and ears. Then roll the clay into a ball, roll the ball into an oval, then press one side to form a skinny rounded triangle. The skinnier side is the top of the head.

Pinch off a tiny amount of black, roll it into a sausage and bend it into a crescent. Squish the crescent flat to form Genie's mouth. Roll tiny amounts of white into sausages and squash them onto the top and bottom of the mouth to complete the teeth. Then attach the entire mouth to the bottom of the face.

Take a little from the blue you set aside and roll it into a small cone. Attach the flat side of the cone to the face, just above the mouth to form the nose. Bend the tip slightly toward the mouth.

Now for the eyes. Use the plastic beads on the end of the booby pin to hollow out some eye sockets on the face above the nose. Pinch off two little amounts of white and roll them each into slightly oval balls. Take an even smaller amount of black and divide it in half. Roll each half into a ball, squish it flat and then press one onto each white ball to form the pupils of Genie's eyes. Gently press the eyes into the sockets on the face.

Pinch off another small amount of black and divide it in half. Set one half aside. Roll the clay into a sausage and attach it to the face under the mouth to form the beard. Add a tiny little curl of black under Genie's chin to give him his goatee.

Take the other half of the black and divide it in half again. Roll it into sausages and then bend them into crescents. Stick each crescent to the face just above each eye to make the eyebrows. Pinch off another little bit of black and roll it onto a droplet shape. Stick this on the top of the head, round side down to make Genie's ponytail.

Take the remaining blue clay you set aside and divide it in two. Roll each into a droplet shape and then flatten. Attach them on either side of the head to form the cute little pixie like ears. Then take the remaining yellow you set aside and roll it into a sausage. Bend it into an almost circle and attach to Genie's right ear (your left).

Finally attach the head to the neck and your Genie is done. Wait for the clay to dry, mine took a day.

To attach them to the basic hooks, use the round-nosed pliers to open the jump rings. Attach the lamp with a jump ring around it's handle, then connect that jump ring to another jump ring which is then connected to the basic hook. This ensures that you can see a side view of the lamp, rather than the less effective top or bottom.

Use another jump ring to pierce through the base at the back of Genie's neck. Use another two jump rings to connect Genie to the other hook.

Rating:

Effort Required: 9/10

These are among the more challenging earrings I've made. The tiny details on Genie require some patience that I almost didn't have. But there's something fulfilling about making something so detailed. I think overall, excluding drying time, these took me about 40 minutes to make. Which is pretty good considering the first head I made bounced away and is still somewhere on my bedroom floor...

Durability: 3.5/10

I would be lying if I said I was sure about this rating. Truth be told, I have yet to wear them out and Louise didn't even know about them before I posted them. I only made them last night. But with the handle and lid handle of the lamp being so flimsy, I cannot imagine they would be all that durable. This depends on the type of clay you used and how big you made your earrings.

Cool Factor: 8/10

Once again, I'm not entirely sure of this. I have yet to wear them out, so this is my own (biased) opinion. I think they're a pretty good representation of Genie and of course, I love Robin Williams. Any accurate movie-based earrings are going to be cool anyway. Also, these are my personal goodbye to one of my all-time favourite actors. I am also 90% certain that you won't find any other earrings like these. 

In memory of Robin Williams (1951-2014) RIP.

Let us know what you think! Your input is greatly appreciated, so let us know if you have any comments, challenges, suggestions or feedback of any sort. We want to see your finished product!  If you like what you see then please follow us and if you want to keep up to date on our latest posts, follow My Earring Board on Pinterest. Thanks for taking the time to view our blog!


Tuesday, 12 August 2014

Ear Phone Earrings


Teaching has some strange perks. The joy of finding an abandoned set of broken earphones on the classroom floor has been one of my strangest.


You will Need:

  • A set of broken earphones. I guess they don't have to be broken when you start but it's always nice not to waste. If they're already broken you get to make something cool out of something useless. You could even call it up-cycling, if you wanted to get fancy about it but I've always thought that the term sounds kind of like an exercise program that's destined for failure.
  • Scissors
  • Super Glue 
  • Basic studs (See Vocab Tab)

How it's Done:

Step one is to cut off the ear pieces, leaving about a thumb length of cord attached to each. 

Step two is to carefully strip the cord (take off the rubbery covering to expose the wires inside) making sure you don't cut the wires in the process. Remove all the covering you can or the effect is somewhat spoiled. In this pair the wires were different colours on each side. This discovery made me happy because all the time I've spent checking my earphones end up in the right ear wasn't a complete waste. It also makes for prettier earrings.

Step three is to wrap the the wires around the ear piece in a criss-cross pattern and then tie a bow in it. Getting the bow right is quite tricky and takes some patience.

Step four depends on what you're working with. If the speaker part of the earphone is still attached and is relatively flat, just super glue the earring stud straight on. If this is not the case, first remove the speaker part from both earrings and then glue some of the cord you cut off, in a coil inside the ear piece to create a fairly level surface you can glue the stud onto.

The final step is to apply a small amount of super glue to each point on your decorative criss-cross where the wires meet. This is to hold them in place and stop them coming undone or slipping off. Keep the gluing subtle though.

Rating:

Effort Required: 5/10

You could save yourself some trouble and just cut the wire off completely but the criss-crossing has the double function of finishing off the earrings and giving them a way to end without making it look like you've performed some kind of brutal decapitation.

Durability: 6/10

The danger with these is not gluing well enough, especially if you stuffed them.

Cool Factor: 8/10

People who think they're cool walk around with earphones in their ears. People who are cool wear them on their ears. It's that simple. 

Wednesday, 6 August 2014

Postage Stamp Earrings


You know how bored people used to collect books full stamps? Well, my aunt was one of those people. And in case you didn't know, postage stamps are sometimes extremely cool. So I sought a way to combine the awesomeness of earrings with that of stamps and this is the tutorial I came up with to share with you lovely people. Hope you appreciate this... post. Haha, get it? Because they're stamps :)


You will need:


  • Two postage stamps of roughly the same size. If you have a pair of identical stamps, great. If not, do what I did and just try to make sure that the stamps you choose are similar or different enough to be cool. Be sure to choose the coolest stamps you can find, but also be mindful of size. Mine are the smaller end of the scale so that they're less irritating. There were some super cool Alice in Wonderland, Benjamin Rabbit and Harry Potter special editions that were just too ridiculously big to use without cutting.
  • Cardboard. It needs to be pretty thick, like, thicker than a cereal box, but thinner than corrugated cardboard. I think I used the bottom of a Lindt chocolate box. By all means, use these earrings as an excuse to buy yourself a box of chocolates.
  • A needle
  • A hammer or something heavy to use as such. 
  • Glue
  • Scissors
  • Clear packaging tape or that clear sticky plastic they use for covering books

How To:

Glue the stamps to the cardboard and then carefully cut around the reinforced stamps when the glue is dry. If you want to test your patience to the max, try and cut in between the little stamp frills. Alas, I, lacking the patience of a saint, opted for the simpler option of cutting a straight line along the frills. I get away with it because my under cardboard is white.

Then take the little cardboard stamps and cover them, front and back, with whatever form of clear sticky plastic you are using. Make sure you cover the whole thing to seal it properly against moisture.Try and keep any overlapping edges neat and to a minimum.

Lay them flat and use the needle and hammer to pierce holes in the top corner of each stamp. They hang in reflection to the other, so the one going in the left gets a hole in the top left corner, and the one going in the right gets a hole in the top right corner. Make sure you leave enough space for the hole to be secure, but not so much that it messes with the aesthetics of the stamp. 

Use the round-nosed pliers to bend open the loops at the bottom of the basic hooks and attach them by the holes in the stamps. Then close the loops.

Rating:

Effort required: 3.5/10

On the whole, these don't take a lot of time or effort to make. The part that gets a little finicky is the covering with plastic because sticky does not have much discretion.

Durability: 6/10

When you consider they're made of paper and cardboard, that's pretty good. They're not particularly elaborate, hence higher durability. This score does however, depend on the thickness of your cardboard, the placement of your holes and your taping prowess. 

Cool Factor: 7/10 

What I like about these is the history involved. Stamps are cool. And they're even cooler because the art of stamp collecting has been somewhat lost on our generation. They're vintage and unique, if you choose the right stamps. The idea has been done before, but not in this way (I googled it) so if you wear them out, you aren't likely to meet someone wearing the same thing (unless they too, are part of our slowly increasing fan-base). They are not always immediately identifiable, but they're still pretty.


Let us know what you think! Your input is greatly appreciated, so let us know if you have any comments, challenges, suggestions or feedback of any sort. We want to see your finished product!  If you like what you see then please follow us and if you want to keep up to date on our latest posts, follow My Earring Board on Pinterest. Thanks for taking the time to view our blog!


Thursday, 31 July 2014

Pokeball Earrings

These are a sort of tribute to a friend of mine who loves Pokemon and bad puns. You just have to make sure you catch them all.


You will need:

  • Two small, hollow plastic balls of some sort. Mine actually came from a magic trick my aunt brought back from Japan so if you can't think of another place to get some, I suggest looking there.
  • Red and white acrylic paint (those being two separate colours. I don't mean pink.)*
  • Black permanent marker
  • Drill with thin bit
  • Flat-end wire pins (see Vocab Tab)
  • Round-nosed pliers (see Vocab Tab)
  • Cutters (see Vocab Tab)
  • Basic earring hooks (see Vocab Tab)
*By the way Meredith, I borrowed your paint. It's on my desk if you need it.

How to:

The first step is the painting. If your spheres don't have a line around the middle you should probably draw one on first. Mine did though. So there.

Paint the white half first because then you can touch up with the red. You'll probably need to do a couple of layers depending on the base colour but try to keep it smooth and even. Usually you will be wearing them both, not taking a photo of the best one like I get to do, so keep it tidy.

After you've painted half of it red and half of it white and done enough layers of each colour and waited for it to dry properly, carefully draw a line around middle of the ball at in black permanent marker at the point where the red and white meet. It's best to keep it thin at first because you can thicken it to even it out.

Once you've drawn a line right around the ball, chose the messiest portion of that line to draw on the black circle. (This is the part that goes around the white button in the middle.) It's easiest to colour the whole circle in black and then pain in the white part on top. Again start small and make it bigger to get it even. Also keep in mind that it's important to get line thickness and circle size the same on both earrings. You're just going to have to assume I did that too.

I used the back of the paint brush to stamp the white circle in the middle of the black because I felt like it was more accurate than my trying to paint one.

Use the red and/or white paint to neaten up the black if you need to. You may only move onto the next step once your Pokeball looks perfect and is completely dry.

The next step is to drill a hole through the ball from the middle of the red at the top to the middle of the white at the bottom. I guess that you could drill from white to red if you really wanted to, but the important part is that you get the hole in the middle and keep it straight.

Insert a flat-end wire pin through the hole from the white side to the red. Getting the pin through can take patience. Cut of the protruding section of pin to about 1cm and twist it into a loop.

Finally you may attach the hooks and wear them.

Rating:

Effort Required: 6/10

When I took on this idea I didn't actually realize how long it would take and what a delicate process doing it freehand would be. I could probably have fetched some masking tape and made this twice as easy but then I would have had to get up and look for it. It's up to you whether or not to believe the effort score of someone too lazy to even make her own job easier.

Durability: 8/10

My brain is vaguely throwing out the objection that paint is not supposed to stick to plastic but this paint doesn't seem to know that. 

Cool Factor: 8/10

It's Pokemon. If you disagree with this score you probably never watched it as a kid which means you are either too young to be wielding a permanent marker, too old to be caring about how cool you look, or think Pokemon is evil - in which case you have more pressing issues.


Tuesday, 29 July 2014

Army Man Earrings


I stumbled upon these two while looking for Lego in a decaying bag of leftovers from my brother's childhood. I enjoy the army-man/waitress combination because it looks like you're making a political statement when all you're really doing is wearing toys.


Materials required for idea implementation:


  • Two army men or any kind of small plastic figurine. These two are Micromen. I'm not sure of they're still a thing.
  • A drill with a thin bit
  • 4 jump-rings (See Vocab Tab)
  • Basic Hooks (See Vocab Tab)
  • Round-nosed pliers (See Vocab Tab)

Actions required for idea implementation

The man and the lady of this pair were made differently. The waitress lady was fortunately made angrier than the guy with the gun. Her arm made a good loop for me to put the jump-ring through. The designer of the soldier was not so considerate. I had to drill a hole in the corresponding place on his body to put the jump-ring through so that both earrings would hang at more or less the same angle.

You'll have to go through a similar process of examination and logical hole-drilling in order to attach your first set of jump rings. 

The second set of jump-rings is to make sure that the earrings hang facing outwards. For every one you add you get a 90 degree rotation. Play around with the number you use until you get the right length and angle.

Finally attach the basic hooks to the topmost jump-ring.

Rating

Effort Required: 2/10

The standard drill-a-hole-and-put-a-jump-ring-through-it score for this blog. I would increase it since it's usually more than one jump-ring, but sometimes you don't even need to drill a hole so it all evens out.

Durability: 8/10

The beauty of making earrings out of stuff that was originally intended to withstand children.

Cool Factor: 7/10

Again, this will depend on the figurines you use. Mine are pretty small and light-weight so they tend to go wandering off into my hair. The matching but not really matching thing is cool though. I feel like people get more excited when they have to put in the effort of checking both the earrings you're wearing.


Wednesday, 16 July 2014

Beaded Bobby Pin Earrings

I saw a version of these earrings on Pinterest and thought they looked really cool. There was no tutorial, but I gave them a go and made up my own.


You will need:

  • Seed beads in varying colours and sizes. The ones that I had were a tad too big, but I used them anyway.

Method

Before I start, here is an expertly drawn diagram of the earring by itself. 


First, decide on the bead sequence. For best results, arrange them in order of size. The amount depends on the size of your beads and the desired length. I used 7 beads and mine are about 2cm long. 

When selecting you wire, make sure that it isn't too thick to go through your earring holes. Start threading the beads onto the wire, beginning with the smallest bead. When the beads are all threaded use the round-nosed pliers to bend a right angle in the wire as close to the top bead as possible. 

Then continue to bend the approximate shape of the wire in my illustration. It doesn't have to be exact because you can easily adjust them once you've tried them out.When you have the general shape, cut off the excess wire using the cutters.

To put them on, simply hook them through your ears and then pull them up so that they run parallel to the lobe. You may find that you need to make them tighter, or that the line of beads runs too straight, so just take them out adjust them.

Effort Required: 2/10

Overall, they took me about 5 minutes to make. It's really not a lot of work.

Durability: 9/10

There isn't much you can do to break these bad boys without hurting yourself. They aren't bulletproof, unfortunately, but you can do almost anything to them and they won't budge. Just make sure that they are tight enough and you're good. If they do bend out of shape from something, you can just bend them back again, no biggie. 

Cool Factor: 5/10

These are what I like to call my 'lazy earrings'. If I'm going somewhere and I don't feel like coordinating, I just put these in. It's a relatively obscure type of earring, so they aren't too common just yet. It also depends on your colour choice, but these earrings really open up a world of possibilities. Who knows, you may be seeing more of this earring base in the future. 

Let us know what you think! Your input is greatly appreciated, so if you have any comments, challenges, suggestions or feedback of any sort. If you like what you see then please follow us and  if you want to keep up to date on our latest posts, follow My Earring Board on Pinterest. Thanks for taking the time to view our blog!